 Skip to content
 Did you know that there is a total lunar eclipse happening March 13th – March 14th, 2025? This is one of the most beautiful and unique sights in the night sky, well worth spending a few hours observing. It begins at 8:58 pm Pacific Time, but the best show will be from 10:10 pm PDT until 1:48 am, with the maximum eclipse at 11:59 pm PDT.
However, a total lunar eclipse is very challenging to photograph! So I wanted to provide some approaches, tips, and best practices you can use in order to get some good shots of this amazing event. Here’s the process I will be using to photograph tonight’s eclipse:
Know when and where
Find clear skies
Previsualize your shot
Camera settings and techniques
Make a plan and write it down

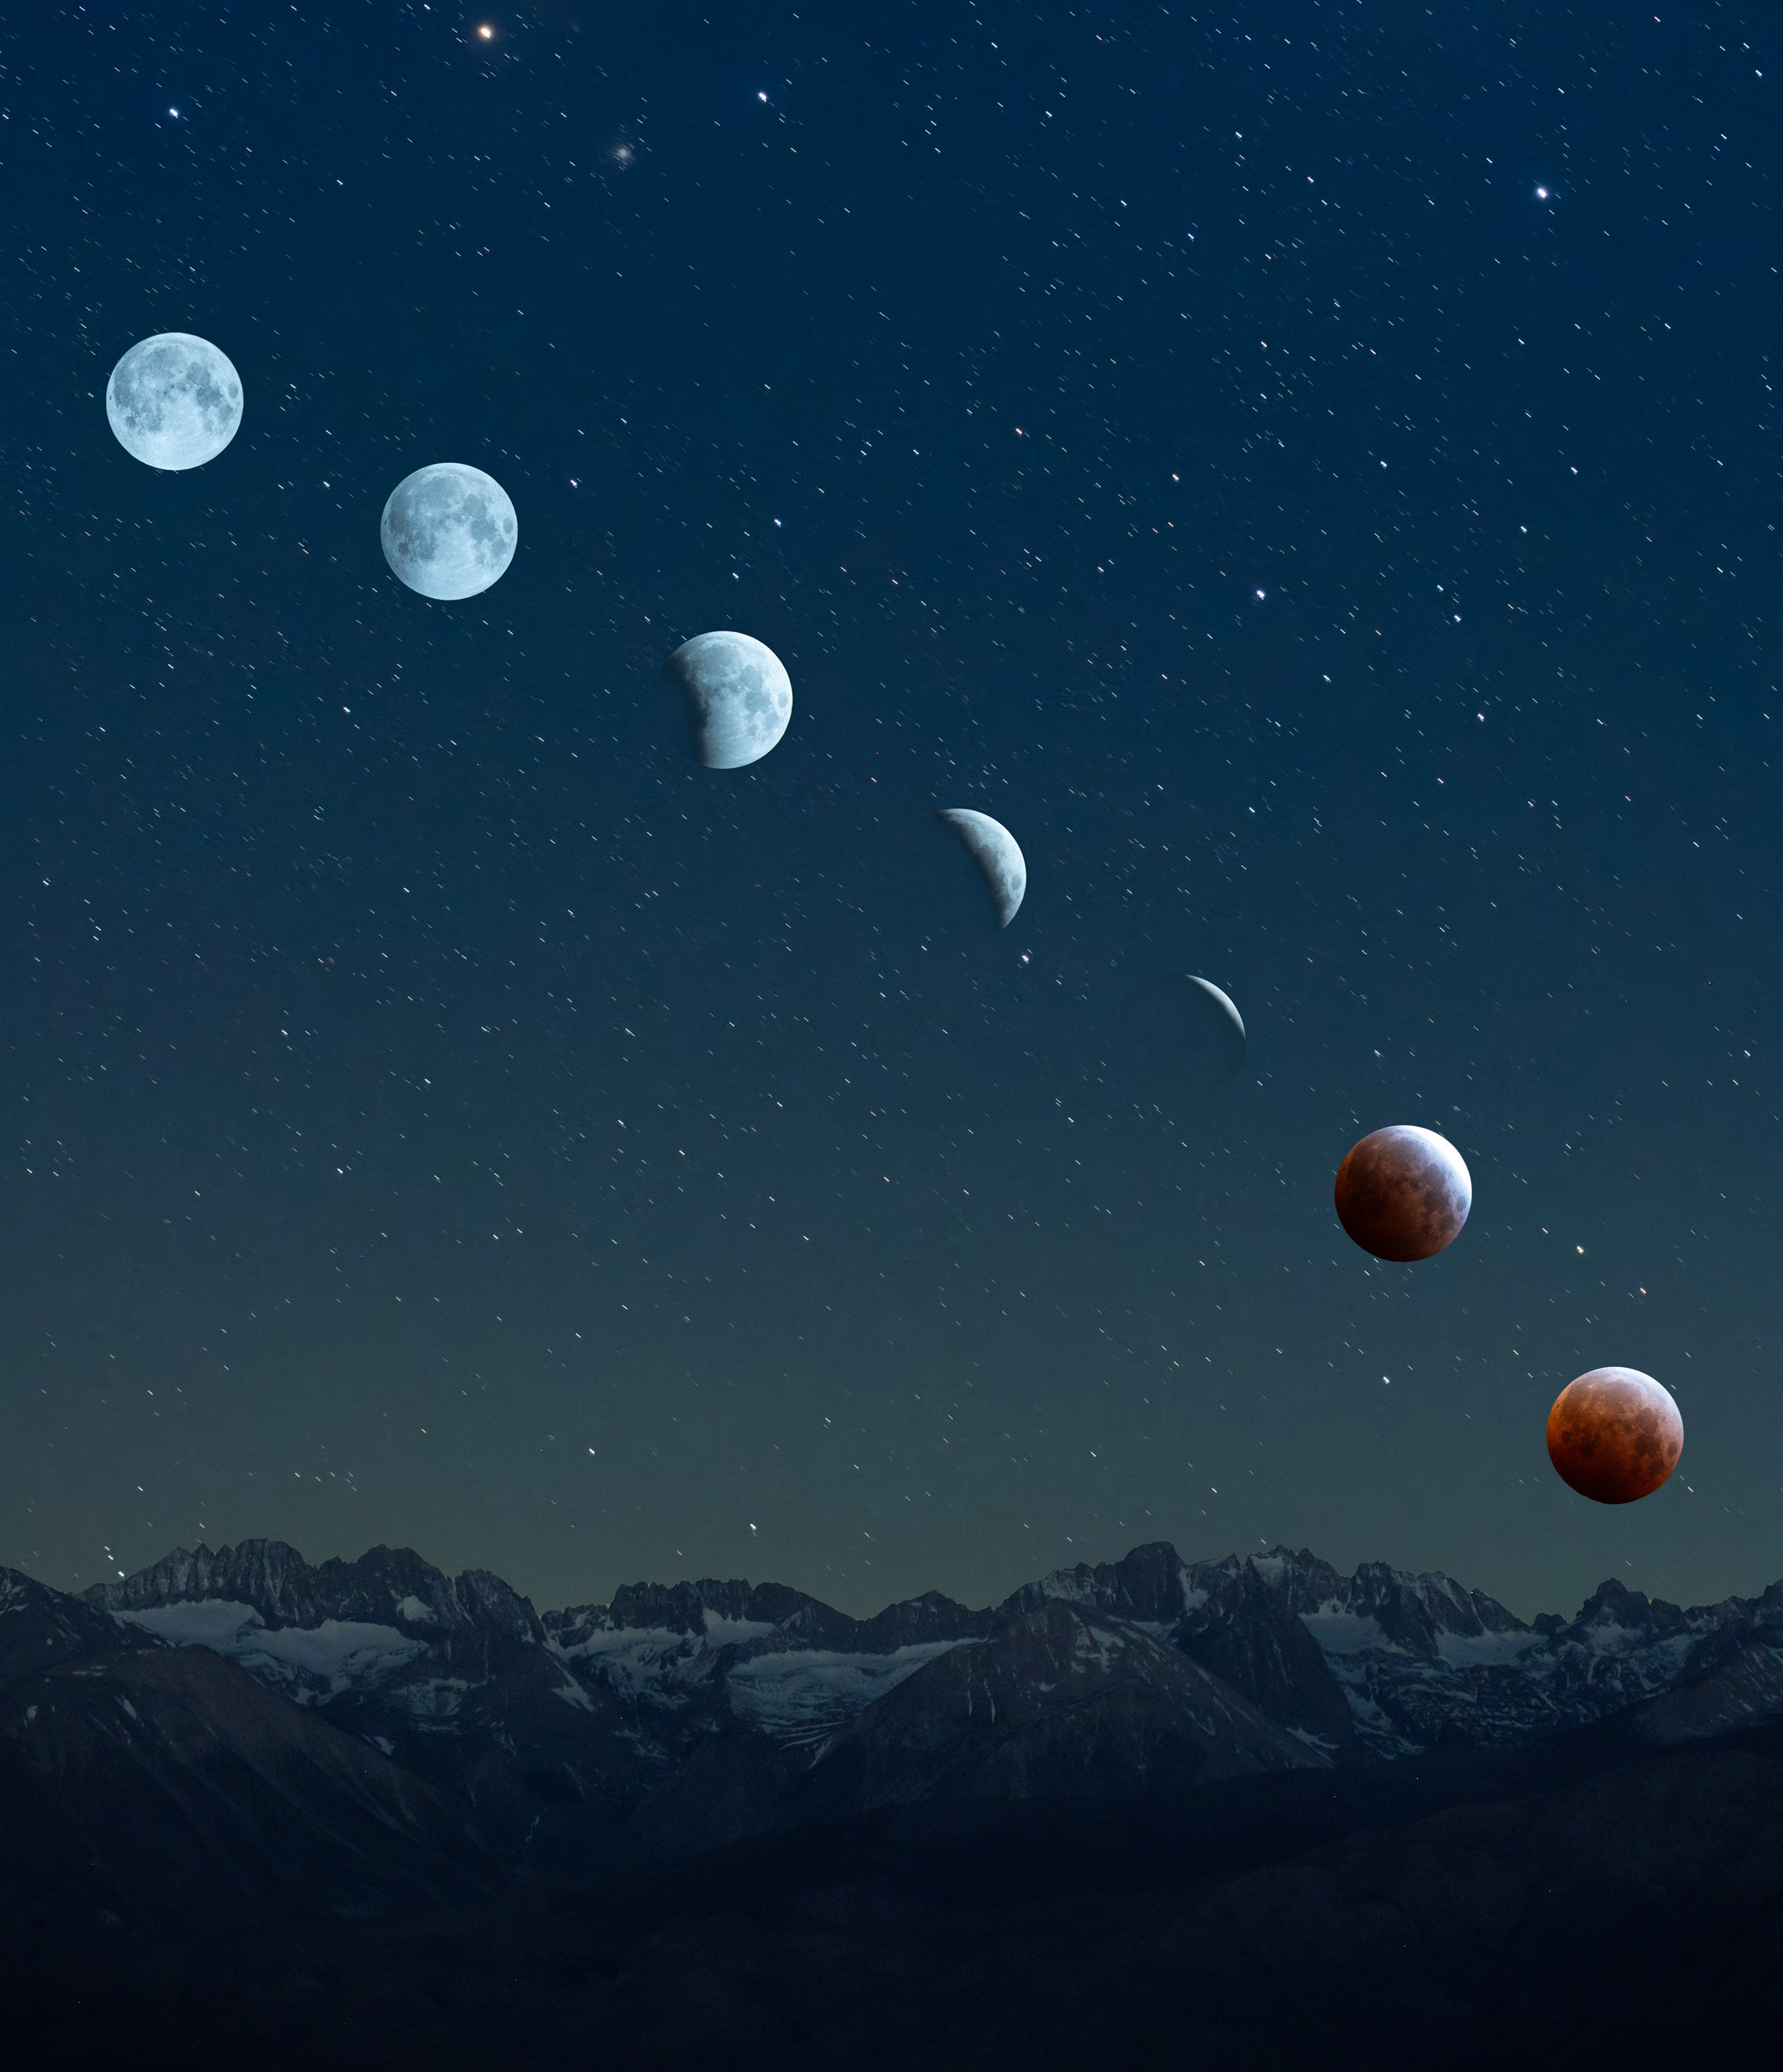
First you have to know when and where the eclipse will appear in the sky. Unlike a solar eclipse, which is usually over in a few minutes, a lunar eclipse can last hours and traverse most of the sky. The March lunar eclipse will go through the following phases (all times are given for Pacific Daylight Time, so do your time zone offset accordingly):
| Time | Description |
|---|---|
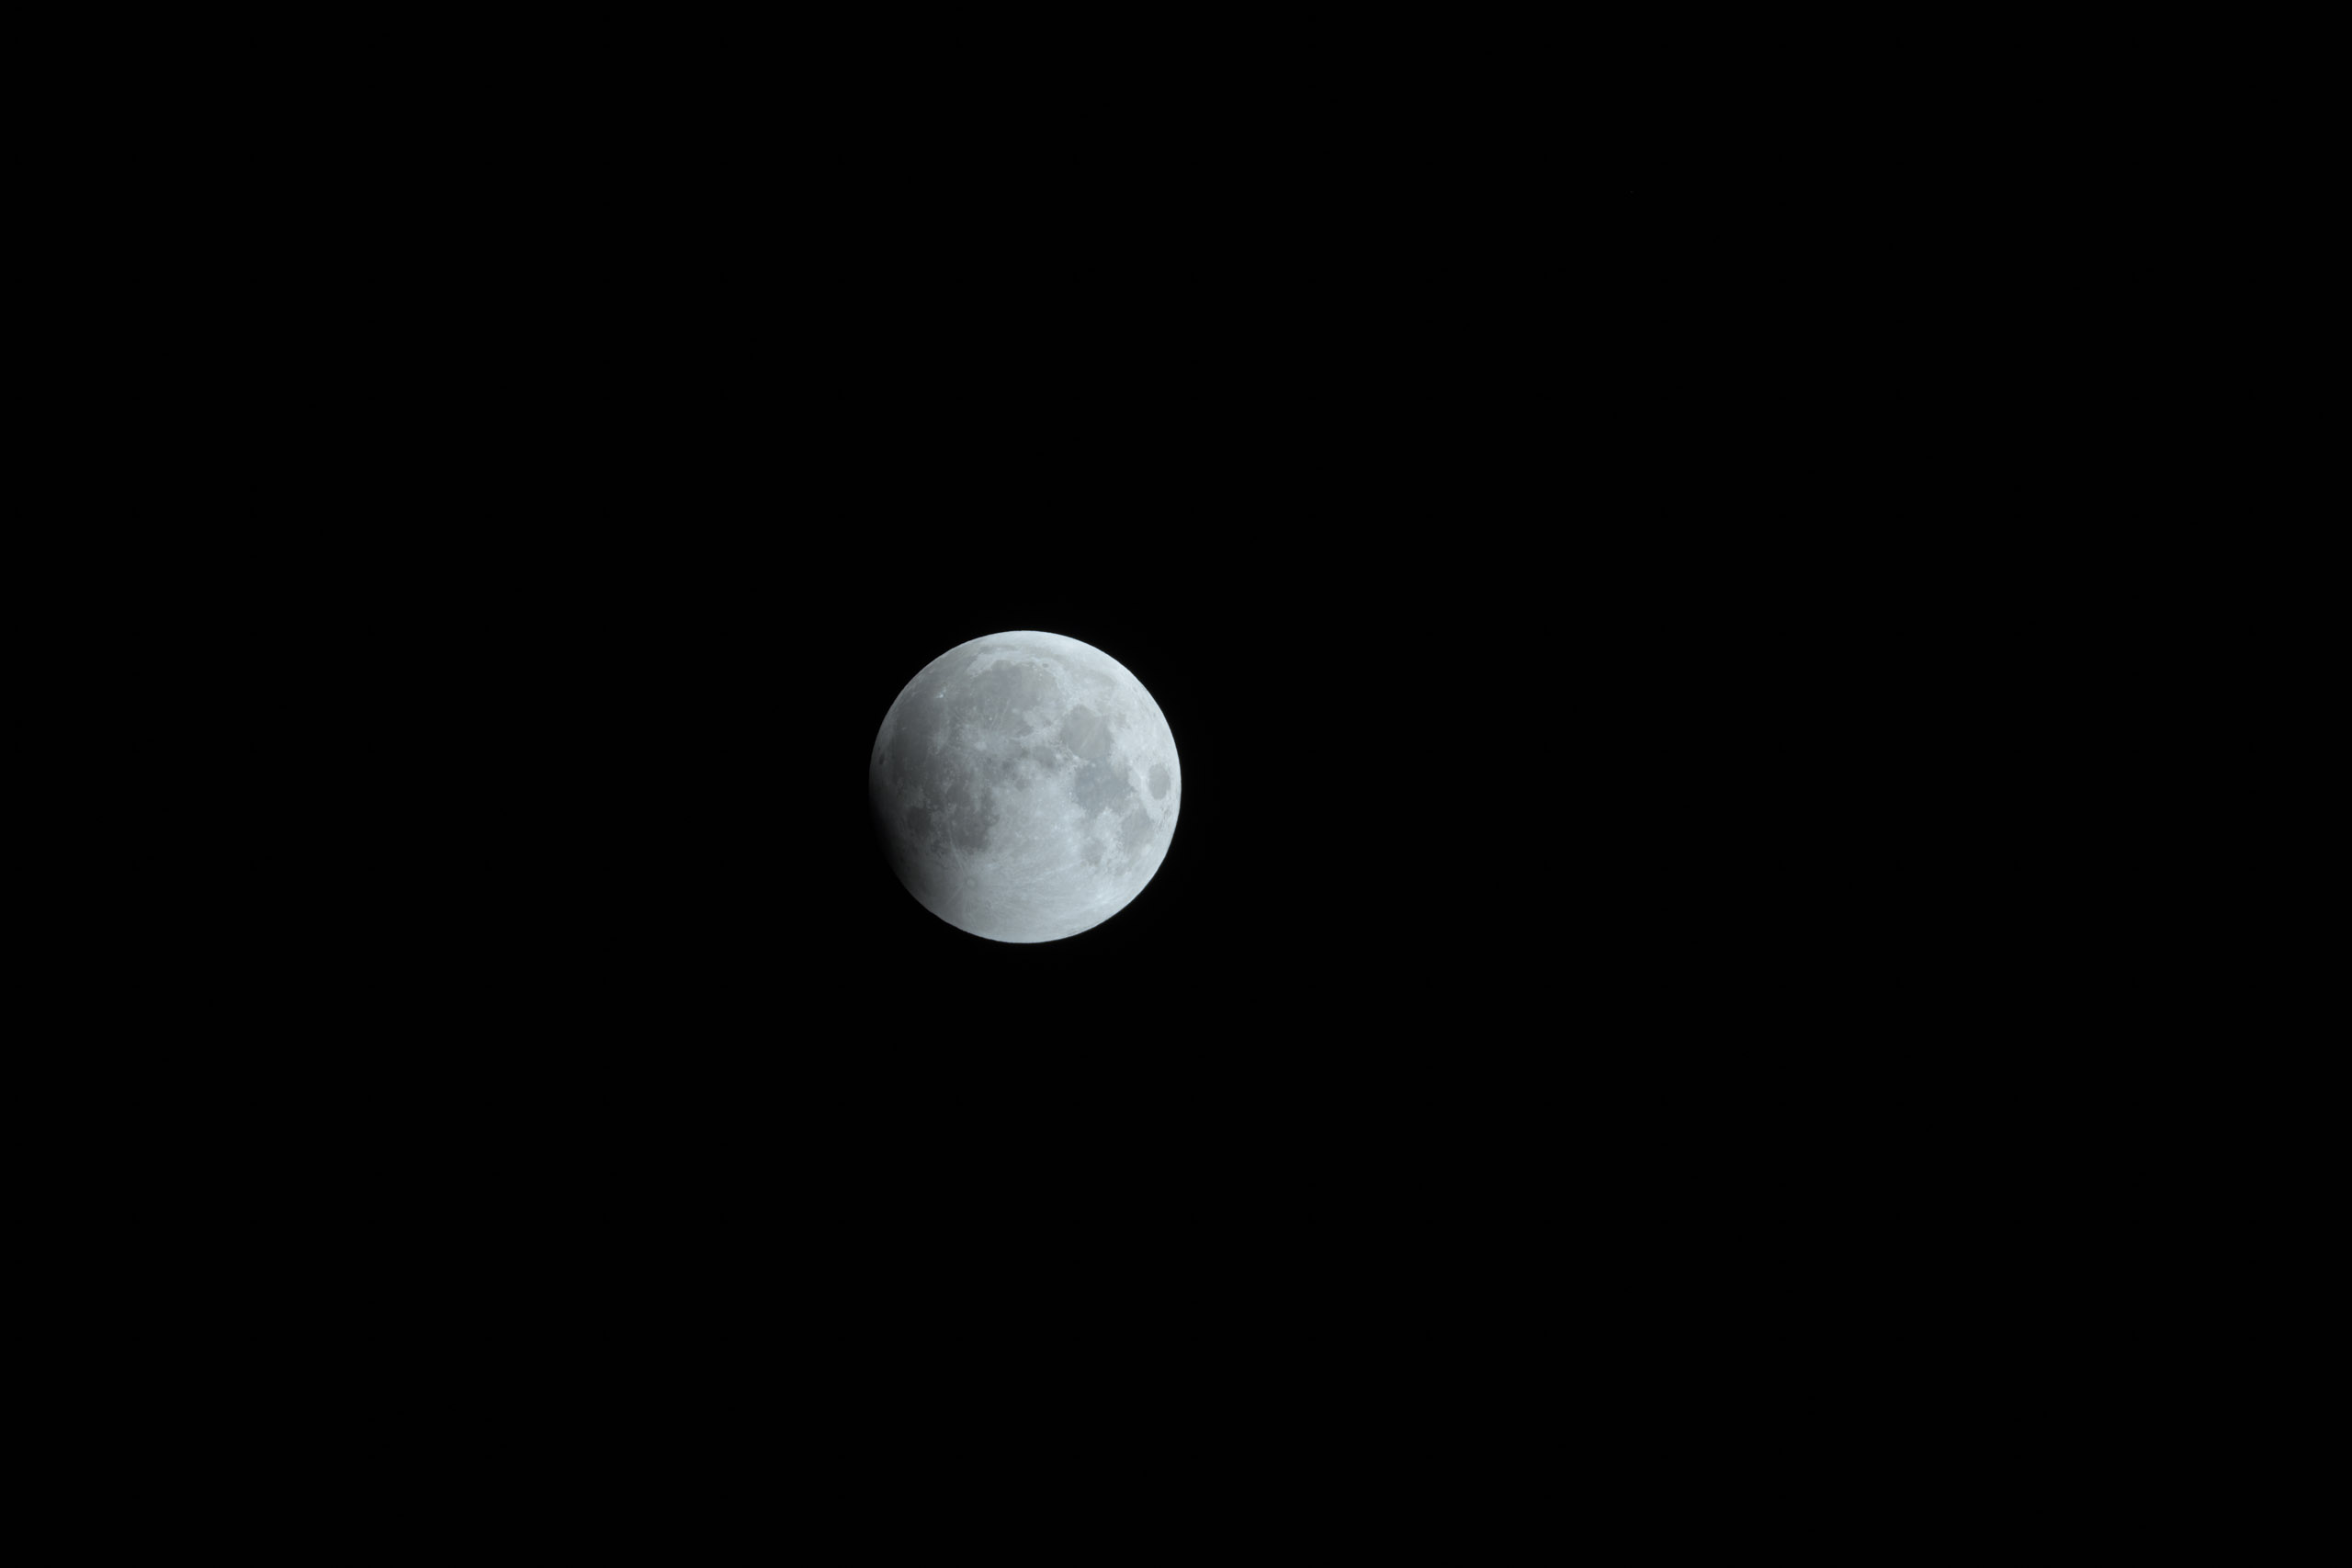
| 8:58 pm | The eclipse begins as the moon enters the Earth's penumbra, or outer shadow. The moon will get slightly darker but you won't see much difference in the moon during this phase. |
| 10:10 pm | The real show starts! This is when the moon begins to enter the Earth's umbra, or its true shadow. This is when you will see the "bites" being taken out of the moon. The moon will get progressively darker and darker until it's just a tiny sliver of bright light. |
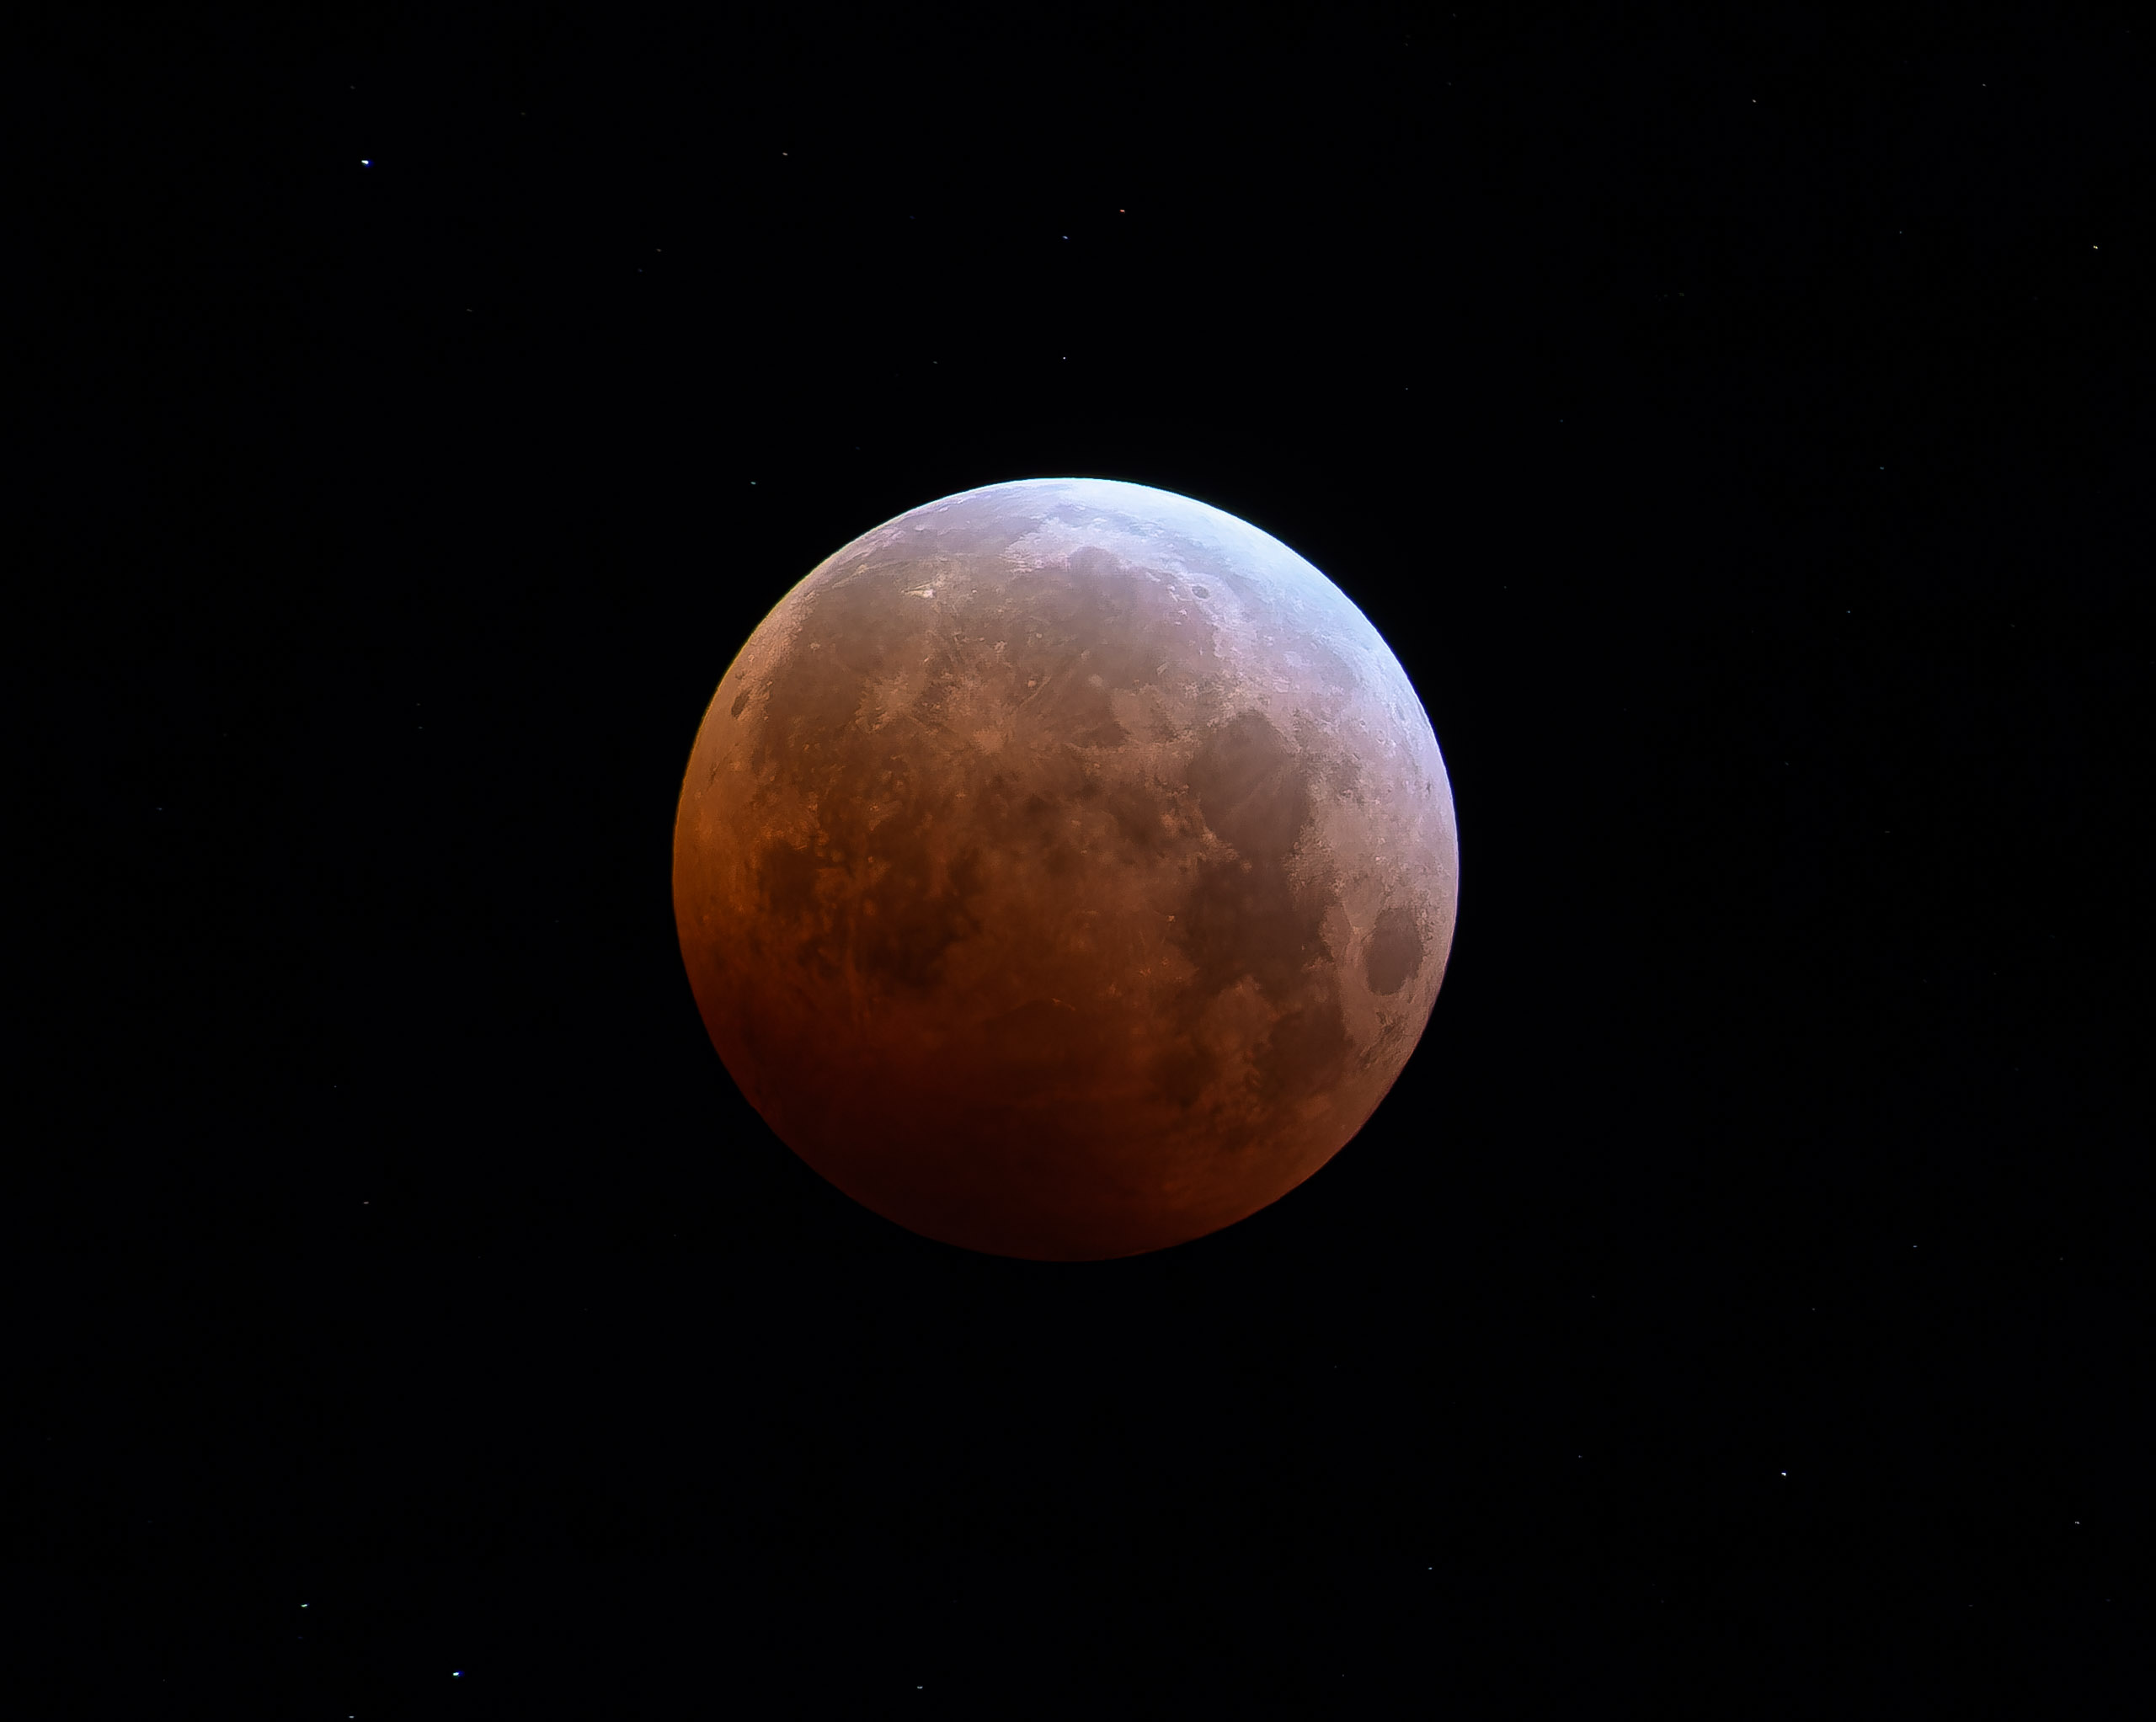
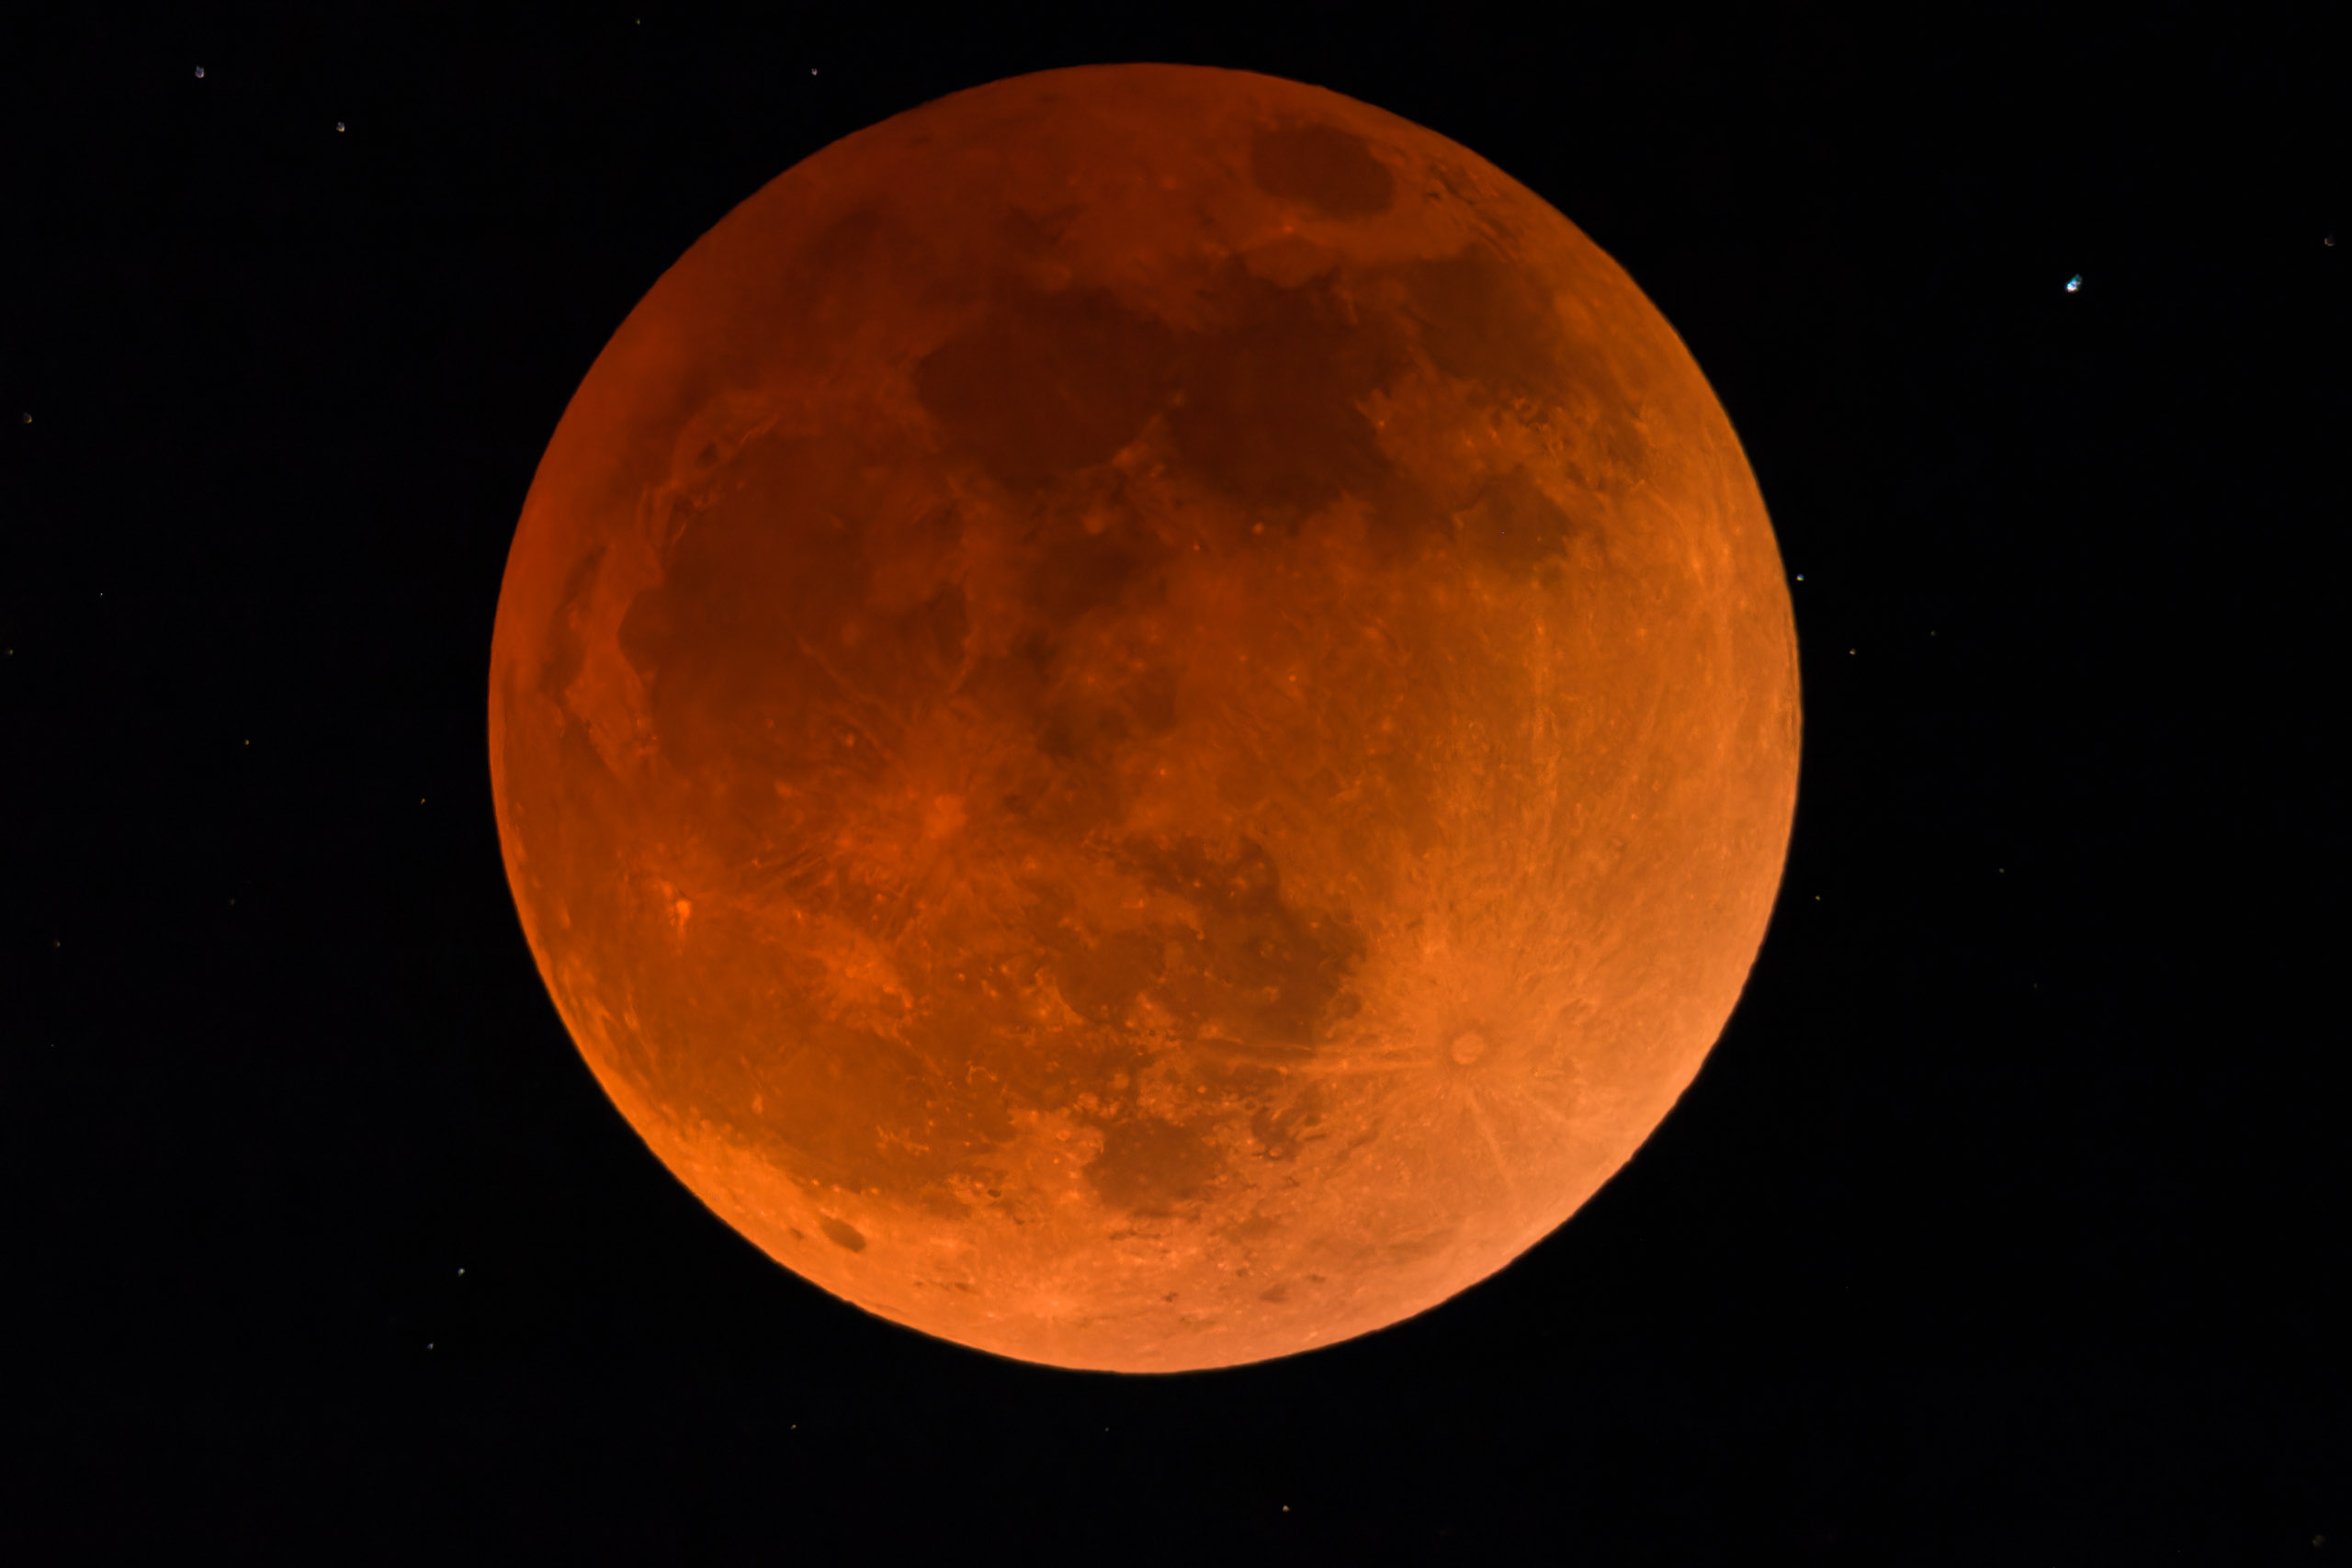
| 11:26 pm | The moon will fully enter the Earth's shadow and its face will be lit entirely by light reflecting off the Earth. Depending on certain factors the moon may appear yellow, orange, or red during this phase. |
| 11:59 pm | Maximum eclipse. |
| 12:32 am | The moon begins to exit the Earth's shadow and grow brighter and brighter as it's lit by the sun. |
| 1:48 am | The moon fully exits the Earth's umbra and appears like a normal full moon once again, although it will still be technically in the outer shadow of the Earth. |
| 3:01 am | The eclipse fully ends when the moon leaves the Earth's penumbra. |
Now you know when, but what about where? This gets a little complicated, because it depends on where you are located in the world. This particular eclipse will be visible in its entirety for all of North America (except the far western part of Alaska) and most of South America. Other locations in the world will just be able to see part of the eclipse, or like most of Asia, it won’t be visible at all. Or you can be in a unique spot like New Zealand where the moon will be in eclipse when it rises.
But since most of my audience lives in the United States, I’ll focus on that. If you’re on the East Coast, it will be more southwest. For Hawaiians it will be looking ESE. In the West Coast it will be to the south, and very high up in the sky. You can use an app like PhotoPills in order to see exactly where it will be for your area, as well as understand how it will move through the sky.
Obviously in order to see or photograph the eclipse you’ll need clear skies. I use the satellite view from Windy.com (which is free) in order to see where there are clouds, and where there are patches of clear sky. Much of the western US is under cloud cover today, so you may need to drive quite a ways to get a clear patch.
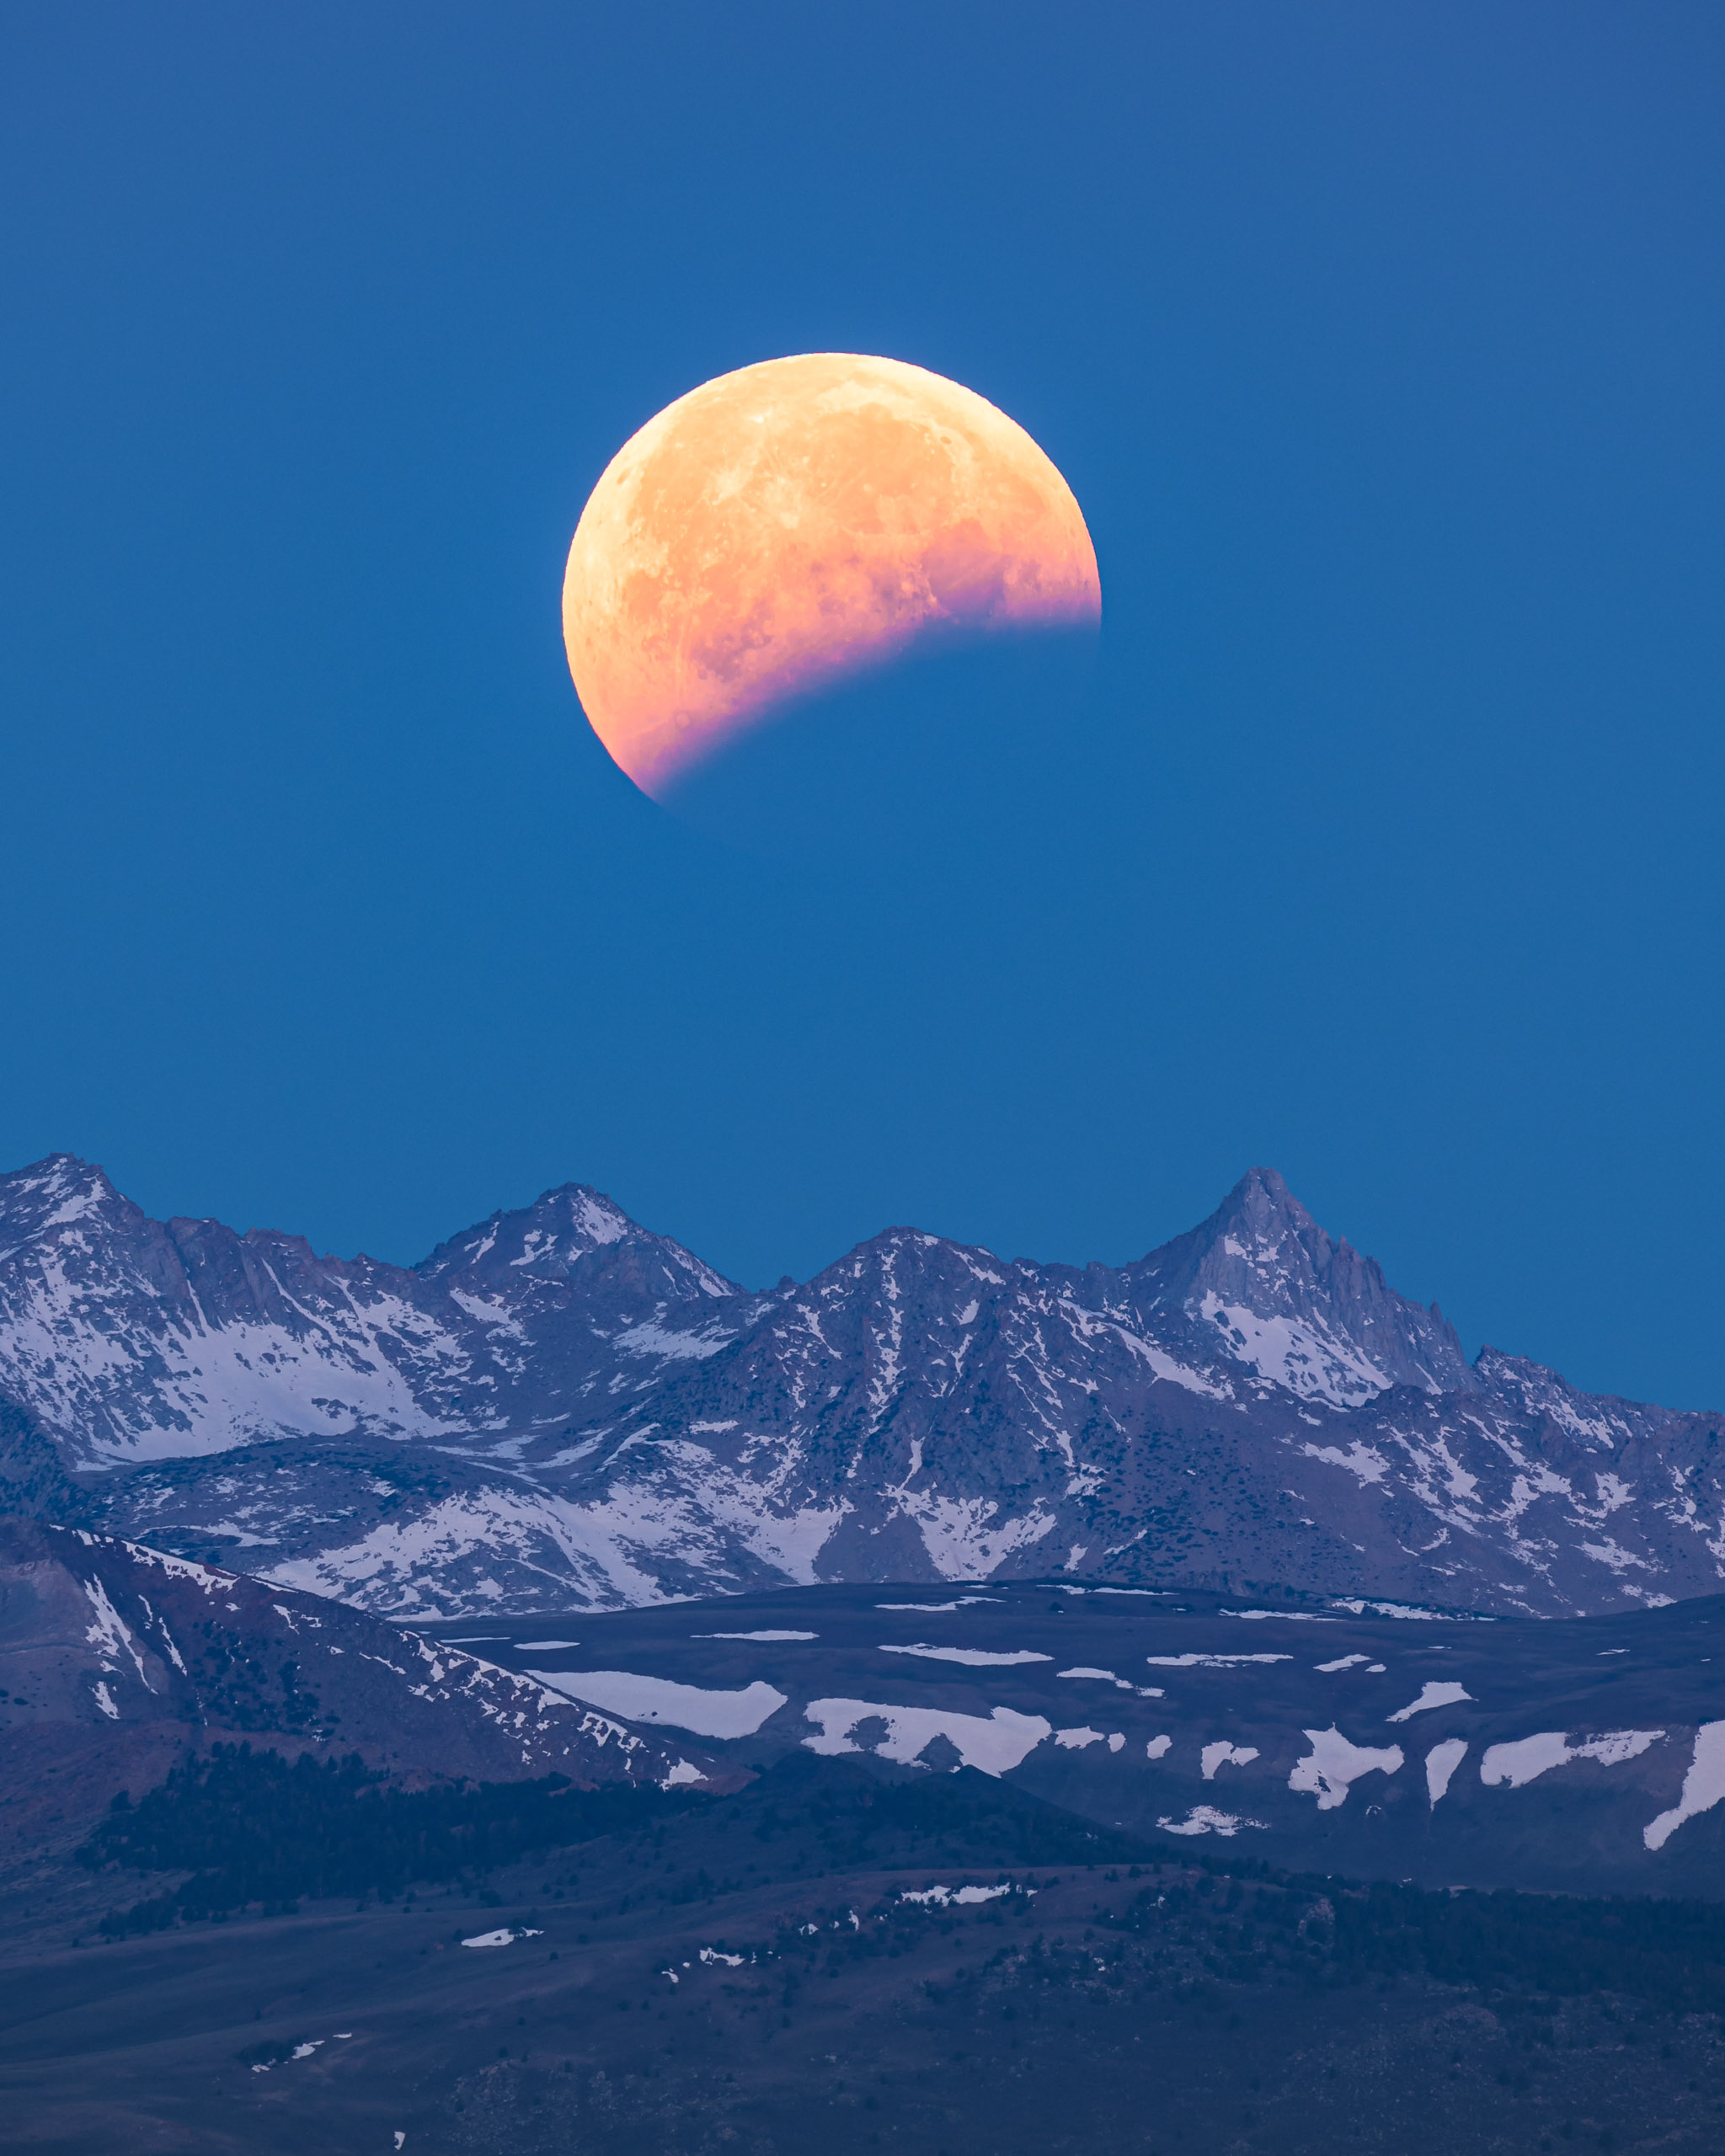
Think about what kind of eclipse photo you want to shoot, because there are so many options!
These choices will determine everything about where you shoot, which lens you use, which camera settings, and your approach to capturing the eclipse, so give it some thought.
The choices you make for your shot will dictate everything about your camera set up. In terms of camera settings, there are far too many permutations to attempt to talk about here, so I’ll just give a couple of example images and the settings I used to capture them. Your setup, shot choice, and weather will lead to different settings and you will have to experiment once you’re on location.
Regardless of your shot choice, I can offer a few best practices for settings:
No matter how you decide to shoot the moon, I highly suggest you write down your shooting plan. For example, if you are planning to create a composite showing the eclipse path over a tree at your house, you might write something like this:
There can be a lot of steps when photographing the eclipse, and it’s a lot to remember. A plan helps make sure you keep on track.
Of course there’s a lot more that goes into creating an amazing lunar eclipse image, but these basic steps will help get you started. If you’d like to learn more about moon planning and eclipse photography, join me for a workshop here at my classroom in Lone Pine.
Now get out there are shoot!


9 Responses
Now you’re talkin’!
Thanks for the blog! It made decide to go ahead and stay up and photograph the blood moon from my house last night. Unfortunately, I didn’t have any interesting landscape to go with it.
Glad you decided to stay up for it! The uncertainty is always part of the fun of landscape photography. Hope you got some decent results even without a foreground.
Great information, as usual??
Glad you found it helpful!
A very timely and thorough tutorial. You may also want to use spot metering on the moon itself to hone your exposure.
Thanks CJ. Metering?? Old school! Haha. 🙂
Excellent tutorial, really useful!
Glad to hear it! Next time you just need good weather to go with it. There’s another lunar eclipse in September, visible throughout much of Asia if you’re looking for a reason to go on trip.