Printing is one of the most important parts of photography. As beautiful as the displays of our computer monitors are, they just can’t compare to a physical print. For me, turning a bunch of digital pixels into something physical that I can touch makes the photograph so much more real. It brings things full circle when a real moment I experienced and captured with my camera is transformed back into something real that other people can experience. The emotional connection you feel with a print is so much stronger than with a digital display that it’s something I believe every photographer should experience.
But printing has a flip side: because a print is real, it can’t be changed. Once it comes out of the printer, you can no longer tweak the colors, contrast, and sharpness. It’s permanent, and that finality can feel intimidating. There’s a sense that everything has to be perfect before you can pull the trigger on a print, and the fear of the print not living up to those expectations of perfection stops so many of us from doing it.
So in this series of articles I will provide the best practices that I’ve learned over the past two years of printing for my gallery. I’ll cover the concepts and processes that have helped me get over my fear of printing, and that have helped me produce prints up to 8 feet wide that completely exceed my expectations, and fill me with awe and joy.

Before I print any photo I inspect the print file at 100% magnification on my computer to look for dust spots or other imperfections. When I first started doing this I was dismayed to see that far too many of my photos also showed sloppy camera technique, like slightly soft or out of focus areas, motion blur from shooting hand held, or blown out highlights or clipped shadows. Strangely, I saw more problems in newer photos than older photos, and I realized that as camera technology improved, all of the technological advancements that were designed to make shooting easier (like in-body stabilization) were actually making me lazier as a photographer.
It was a great reminder that if something is worth shooting, it’s worth shooting right. If your goal is to shoot for print, then you should take the time to ensure your technique is flawless. Since then, I have put more emphasis on my camera technique, and my prints have improved noticeably as a result.
Here are the things in terms of shooting technique that I’ve found make the biggest differences in the quality of your print files:
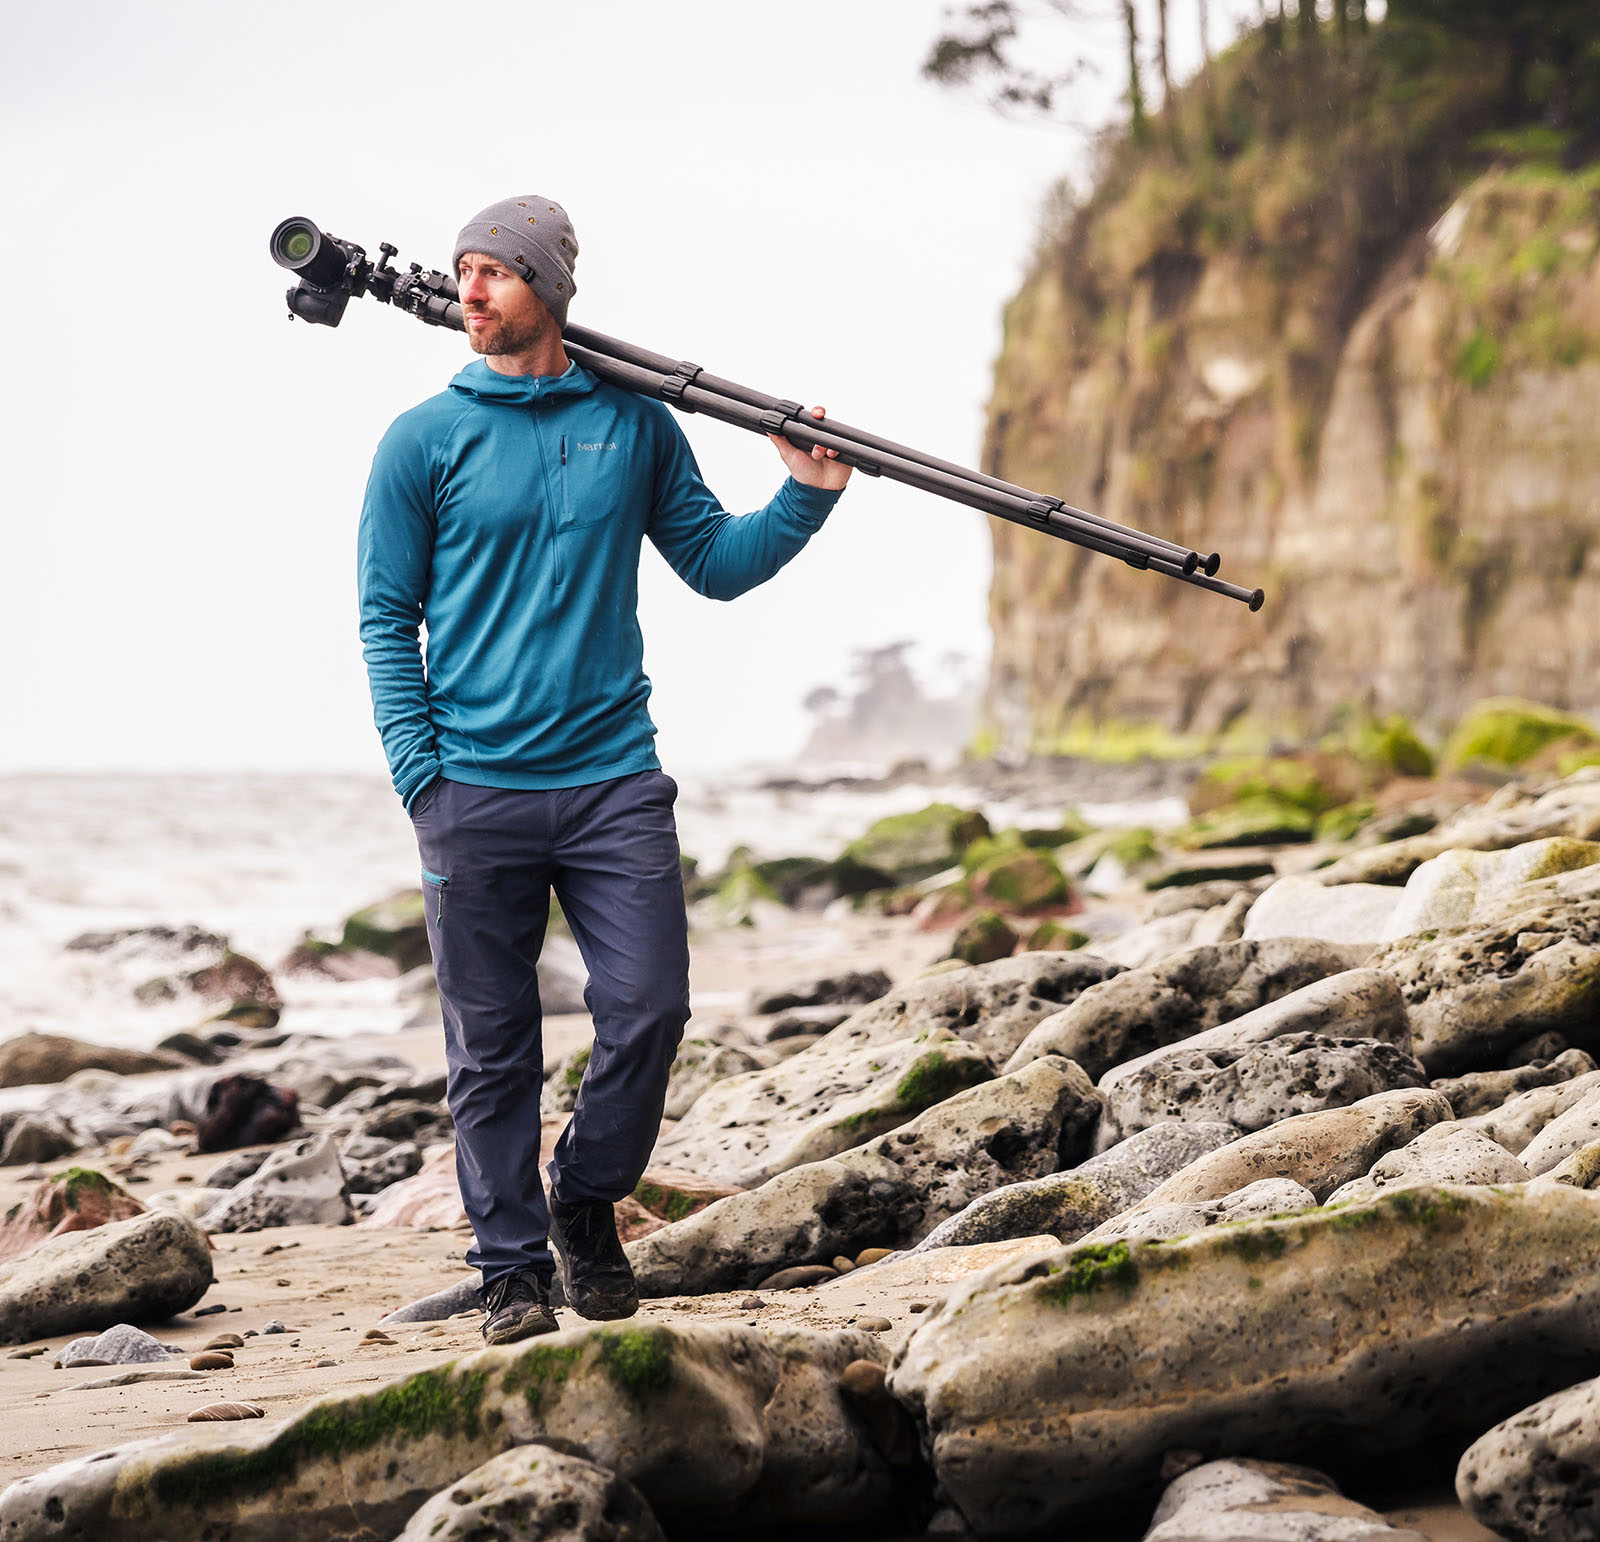
By far the most important thing is to put your camera on a tripod. Handheld shooting with image stabilization is fine when you’re trying to establish an initial composition or conditions are extremely fleeting and you need to shoot fast. But otherwise, being on a tripod allows you to create the highest quality possible shots. Not just because you can eliminate camera shake or shoot longer shutter speeds in low light, but also because it makes you more deliberate. You can refine your composition much more intentionally and ensure every part of your photo is exactly as you want it.
In addition to the tripod, make sure you are using a remote shutter release, the self timer, or mirror up mode in order to eliminate the shake that comes from pressing the shutter button or any internal movement in the camera (like the mirror or shutter moving). This will ensure you don’t have any fuzzy areas in your photos from the camera itself moving around.
One of the most painful feelings in photography is finding an amazing scene, composing a perfect frame, dialing in a great exposure, and shooting the photo, only to discover when you get home that your photo was out of focus. I’ve found the most reliable method of getting razor sharp focus is to magnify the image to 100% in Live View, then use manual or autofocus to make sure the details are as sharp as possible. And any time you recompose, or change your focal length, you should refocus. Also make sure you understand Depth of Field and choose your f-stop to be appropriate for your composition.
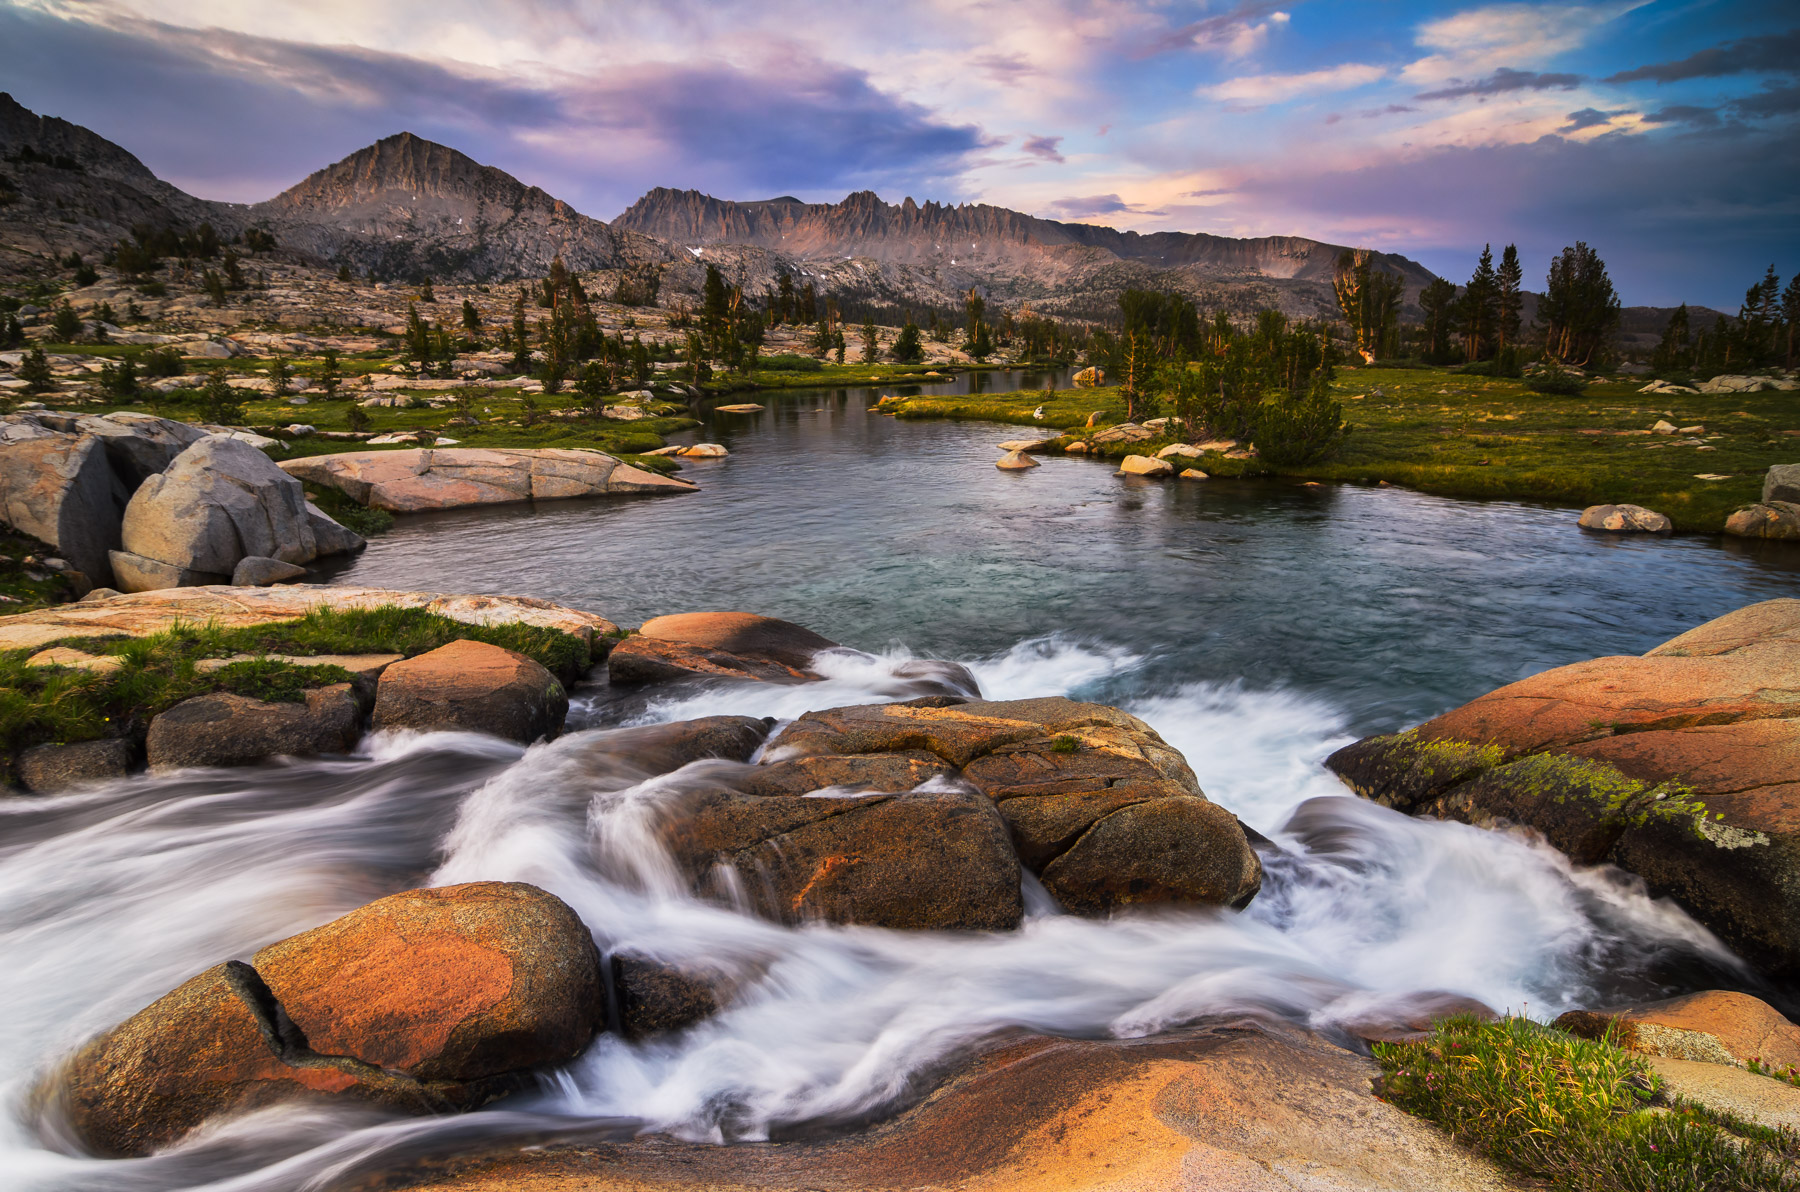
Anytime you are shooting anything moving, shutter speed becomes an incredibly important artistic concern. Take the time to understand the movement in your frame and choose a shutter speed to complement it. Most objects look best either frozen in place, or with enough motion that it looks deliberate (like a flowing wave). When you aren’t paying enough attention to the movement in your scene, motion in your photo can become a distraction. For example, if you have a single flower moving around in the wind while everything else in the frame is sharp.
In terms of producing clean, noise-free files, there is no factor more important than getting a high quality exposure. Generally speaking, the brighter your raw file is, the cleaner it will be, especially if you do any extensive post processing. Just avoid blowing out your highlights.
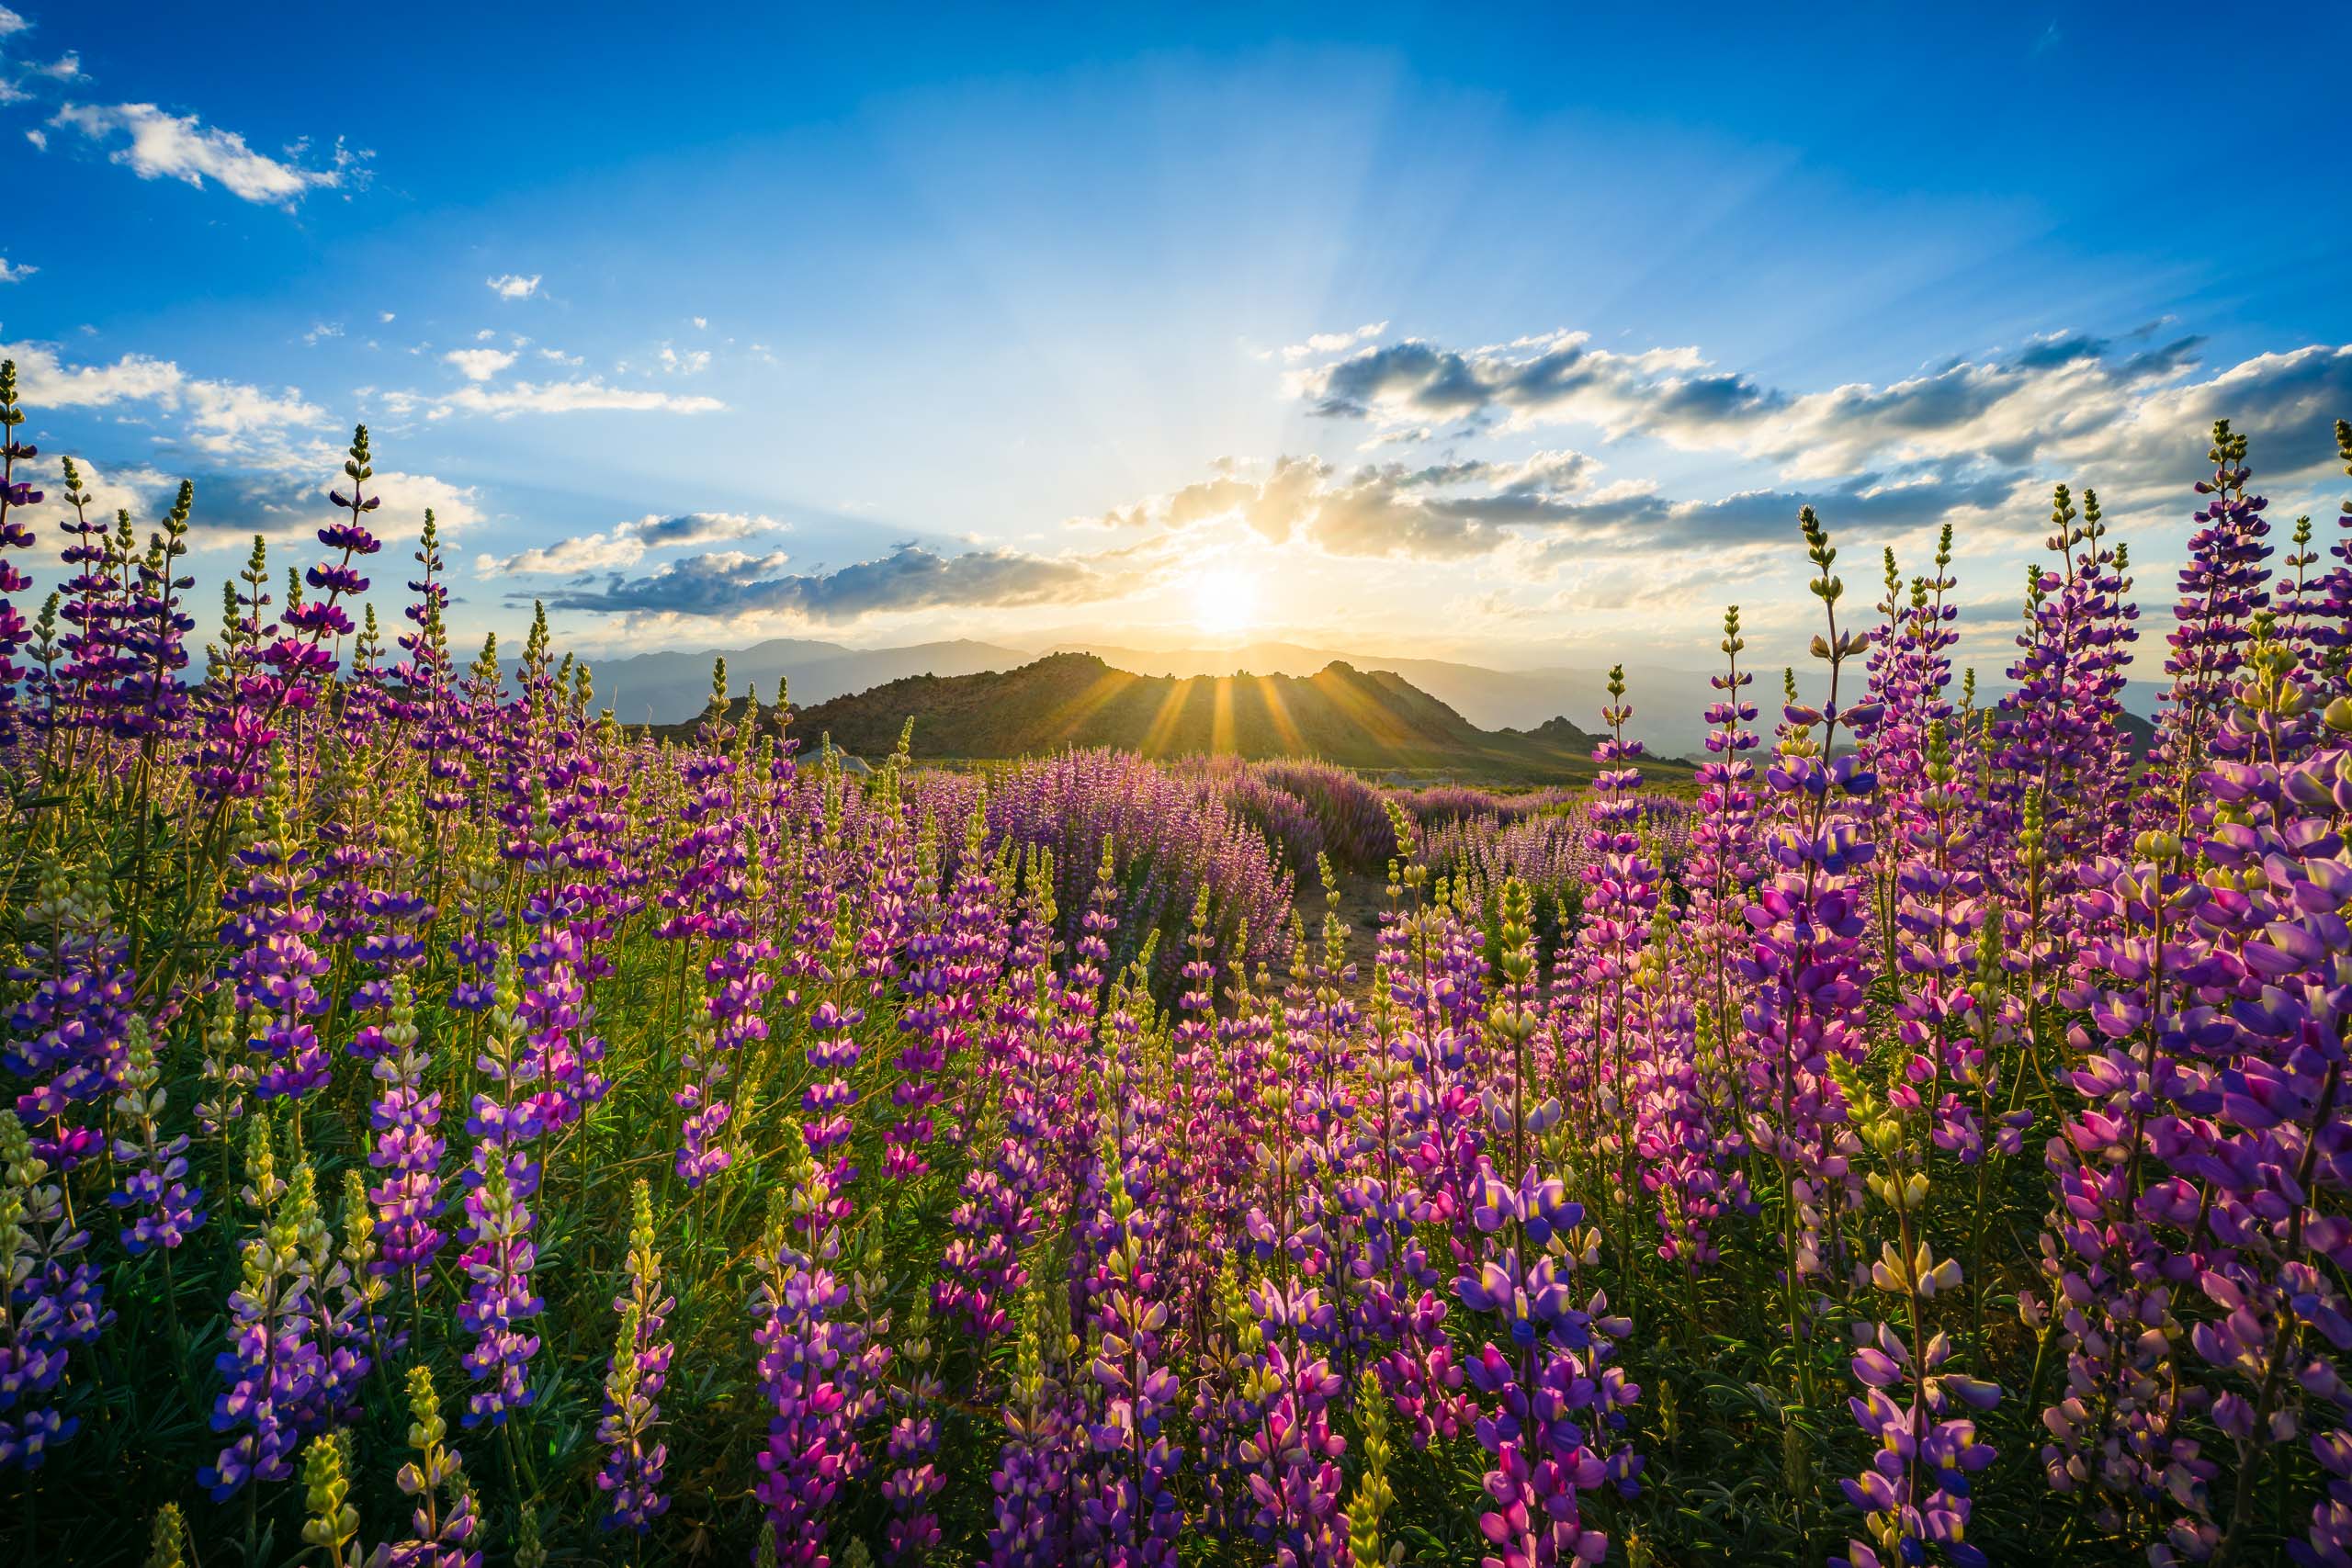
In high-contrast scenes (like shooting directly toward the sun), you may be forced to dramatically underexpose most of your scene in order not to clip your highlights. In this situation, bracketing is an amazing tool to allow you to create a high quality image in post. I recommend shooting 2-3 bracketed shots, to cover a 2-4 stop exposure change. For a full article on this, click here.
Lens choice can make a big different in the quality of your print files, especially in the detail near the edges of your frame. 12 years ago when I switched from budget lenses to professional quality ones, I couldn’t believe how much it improved the fine detail of my images. Yes, it hurt my wallet to splash out on those higher-end lenses, but the photo quality for print was well worth it. Thankfully most modern lenses, even entry-level ones, are incredibly sharp and this isn’t something we have to worry too much about anymore.
I debated adding this option. Obviously, high quality, sharp lenses and higher resolution cameras will allow you to show more detail in your photos, but that doesn’t necessarily mean that your photos will be better. In my gallery I have images displayed that I shot with a 16-mp camera all the way up to my current 46-mp Nikon. And although some people do mention the level of detail in my large prints, not a single person who has ever purchased a print has asked me how many megapixels my camera is. That being said, I personally wouldn’t try printing an 8-foot wide print from a 16-mp camera, but if you aren’t planning to ever print larger than 24″x36″, resolution is less of an issue than the rest of your camera technique.
These are the shooting and field techniques that I’ve found make the biggest difference in the technical quality of my print files. Do you have a favorite thing you do in the field to improve the technical quality of your images? Let everyone know down in the comments!
In the next article I’ll be discussing choosing which photos to print and print media. Then we’ll get into processing for print, proofing, and so much more. Stay tuned!
Joshua

Joshua Cripps is a renowned landscape photographer who has garnered worldwide acclaim for his breathtaking images of our planet’s wild places. His photos have been published by the likes of National Geographic, NASA, CNN, BBC, and Nikon Global.

The Mt. Whitney Gallery was founded in 2023 by Joshua Cripps as a way to share his passion stunning landscapes of the Sierra Nevada and beyond.
Set at the foot of the breathtaking Sierra with a view of the range’s highest peaks, the gallery features large format, museum-caliber fine art prints of Josh’s signature photographs.
Course Login | Results Disclaimer | Terms and Conditions | Privacy Policy
© Copyright – Joshua Cripps Photography

24 Responses
I just started printing some of my photos, and agree with everything you’ve said. I’ve also learned to let my potential prints “marinate” for a bit, mostly because I have to be able to look at the photo objectively to make good final decisions. I recently failed to zoom in and look for dull/ blurry areas and was disappointed with the print. A good lesson though, always learning! Looking forward to future blogs! Thanks for sharing Josh!
That’s a great point, Mary, to let the photo marinate a bit. I’ve found there’s a needle to thread though: if you marinate too long, you always find something else to tweak!
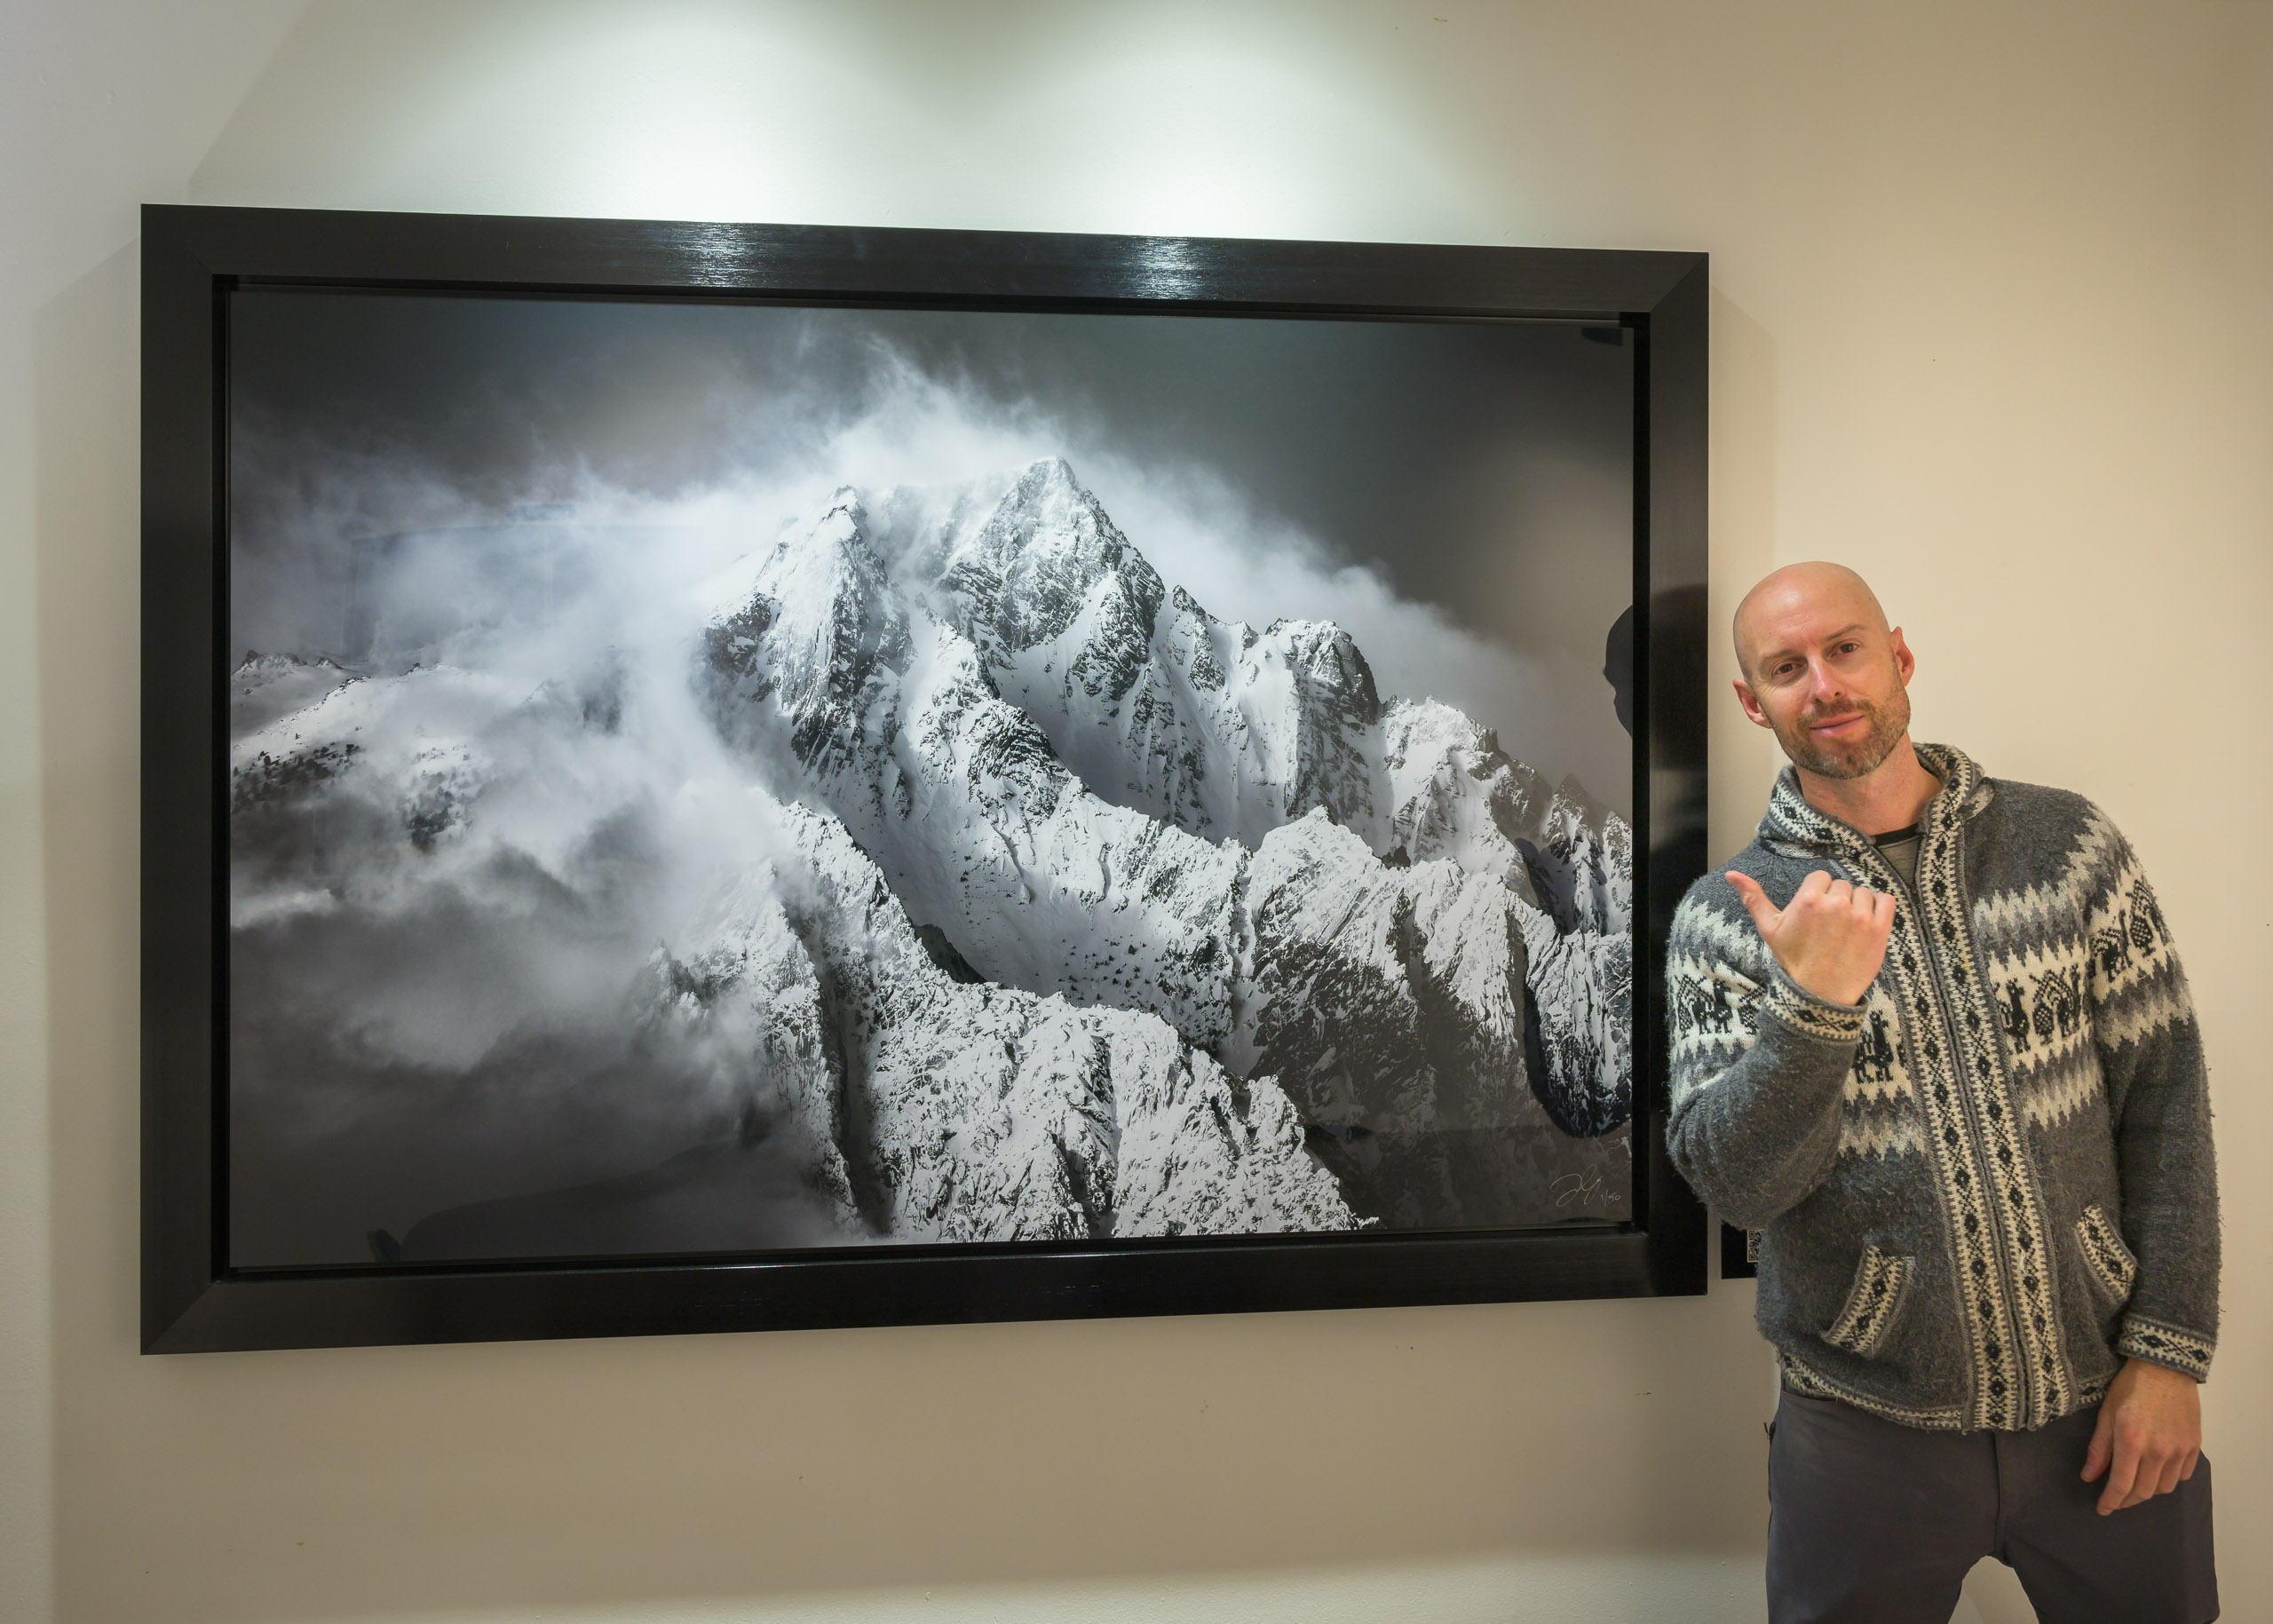
I love the photo of you standing next to the stormy mountain scene. A large print certainly helps to enhance that photo much more than just viewing it on a monitor. Good job. You must have one gigantic printer! Thank you for the information and for your willingness to share your experiences and tips.
Thanks Joe! That shot is a favorite of mine as well. Since the prints at the gallery are on metal I don’t print them myself, but I have an amazing printmaker I work with. magnachrome.com
Very informative, looking forward to more info
Great, glad you enjoyed it.
Great first article on your field techniques for successful printing. Looking forward to the rest of the series.
Thanks Ted, glad you enjoyed it!
I agree 100%. Image printing brings the photographic process full circle. The bigger the print the more awe inspiring the image becomes. I use an old Canon Pixima Pro 9000 Mk ll so the biggest image I can print is 13 x 19. Just big enough to take in the glory of a well exposed detailed image. I shot St. Patrick’s Cathedral at night from a higher elevation with my D7200 and a Tokina Pro wide angle lens. The sharp details of the stonework and colors at night only helped make the large print so much more enjoyable. The final print brings the whole photographic process to a crescendo.
I’ll bet the details of the Cathedral were fantastic!
Great artis and wonderful teacher!
Thanks Miroslav!
Great pics,
Having been on the ground with you, I urge all others to get some real time with you.
Cheers, Dave. You’re very kind.
Great images. I always follow this workflow when shooting
Excellent! You are well set up for printing then.
Hey, Joshua! Great start to the series. I look forward to the remainder of your articles. Keep up the good work.
Cheers, CJ!
Great comments and all so true. Just had a large print made from the fall colors in the rockies and it is such a reward to see it like you said. Large prints really help one get back to the real scene.
Thanks for your review. I love my Z 8 and great lenses. What you said is so true.
Thanks,
Bill
That’s awesome, Bill! There’s nothing like a big print.
How much different it better are the imams from the d850?
The D850 produces amazing images, but it’s still important to practice good field technique.
Do you have any advice for those of us that wear glasses when we’re shooting? I’m struggling to see clearly through the EVF in bright sunlight situations. I’m considering going back to a system I used for many years as a camera operator in the film business called monovision. With no glasses, I used my right eye to look through the finder and adjusted the diopter to get a sharp image. On my left eye I wore a contact lens with a prescription that allowed me to see clearly at close range so I could focus on the camera and lens controls. It’s amazing how the brain can concentrate on the eye that is needed and ignore the eye that is not. I was able to work all day, alternately looking through the camera then taking my eye out of the eyepiece to read a script or make some adjustments to the camera. And my brain decided which eye to concentrate on. The system worked really well. Maybe I’ll go back to it. (Note: My eye doctor tells me that about 30% of the population can’t make monovision work. Their brains just won’t do it.)
Hi Dan,
Great question. My first thought is, have you tried adjusting the diopter on your EVF so you can look through it without wearing glasses?
Second, I highly recommend using a loupe as well, like this one (https://www.adorama.com/hnh32mb.html). It lets you view the LCD screen glare-free, and it also has a diopter adjustment so you should be able to use it without glasses.
Let me know if that works. Cheers,
Joshua